How to Press Tropical Blue Uniform
Step 1. Pressing the Shirt – Look Sharp
a. Iron with steam and let cool.
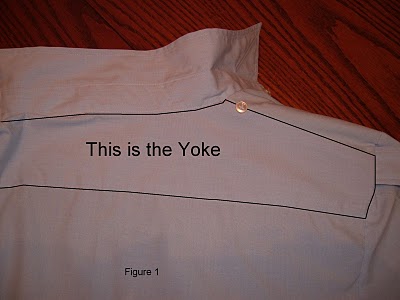
b. Starch with no steam to get wrinkles out (do a panel at a time).c. The Yoke (figure 1) will need two be starched twice at this step as well as the epilates and collar. This will not be starched later and will help pop your military creases on the back.
Step 2. Adding the military crease to the front on the shirt.
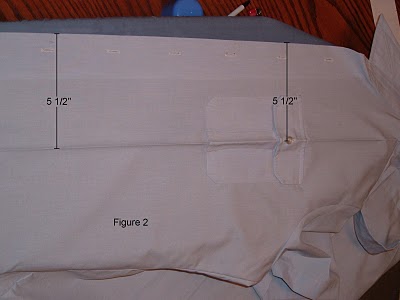
a. The crease will run right through the shirt pocket button. Measure this distance from the edge of the shirt to the button (see figure 2) This will be the distance from the top to the bottom of the shirt.
b. With no steam very lightly press the crease from the button down to the bottom of shirt.
c. If you feel the crease is right, press with steam.
d. Now starch and iron twice to set the crease.
e. With no steam very lightly press the crease from the button up to the top of shirt and repeat steps C and
f. Repeat step 2 for the other side.
Step 3. Sleeve creases.
a. Fold the sleeve in half with the seam at the bottom of the shirt.
b. Lightly crease the shirt with no steam.
c. If you feel the crease is right, press with steam.
d. Starch twice and flip the shirt and starch the backside twice.
e. Repeat steps A, B, C, and D for the other sleeve.
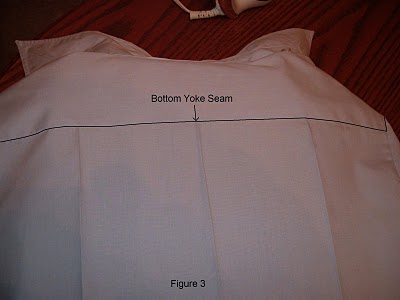
Step 4. Back Creases (DO NOT CREASE ABOVE THE BOTTOM SEAM OF THE YOKE, SEE FIGURE 3)
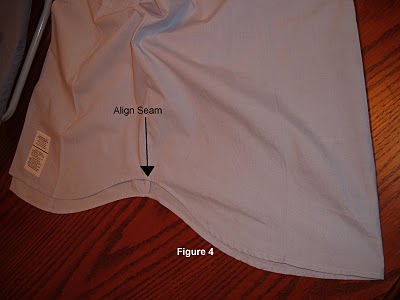
a. Fold the shirt in half to find where the middle crease will go. This step should be taken with care. This will make your creases straight or angled. (Align the side seams to get the straight crease). (See figure 4).
b. Once the middle is found, lightly crease with no steam.
c. Press middle crease with steam to set temporarily.
d. If you have a DVD case, you can use it to set the width of the other two creases along the back.
e. Use the DVD case width to find your crease and slowly press the crease with the dry iron.
f. Press side crease with steam.
g. Repeat steps E and F for other side crease.
h. Start from one side and starch each side of the crease twice.
i. Work your way to the middle and then the other side by following step H.
Now your shirt is squared away and you’re ready to install your attachments.